EN-Product-Hot-Rolled-Structural steel-All grades Overview TSUK
Availability
Structural steel products are available as follows:
- As-rolled (+AR)
- Normalised rolling (+N)
- Suitable for cold forming (C)
- Suitable for post-galvanising (Class 1)
- Weathering steel (W)
Relationship with standards
Hot-rolled structural steel complies with European standard EN 10025: 2004 and is available in the grades shown in the table below.
If normalised rolling (+N) or cold forming (C) is required, please specify when ordering. In these cases, this should be indicated by adding the relevant letter to the grade at the time of ordering (for example: S355J0C+AR). Cold forming cannot be guaranteed for structural steel that is not specified as cold-formable.
| European standard | Charpy | Weathering steel | European standard | As Rolled | Normalised | Suitable for Cold forming | Suitable for Post galvanising | |||
|---|---|---|---|---|---|---|---|---|---|---|
| EN 10025-2: 2004 | JR | J0 | J2 | K2 | W | EN 10025-2: 2006 | AR | +N | C | Class I |
| S185 | Y | Y | Y | |||||||
| S235 | Y | Y | Y | Y | Y | Y | Y | |||
| S275 | Y | Y | Y | Y | Y | Y | Y | |||
| S355 | Y | Y | Y | Y | Y | Y | Y | Y | Y | |
*For products produced in the Netherlands click here.
The CE mark
The CE mark is a symbol devised by the European Council to signify that a product meets the conditions of the applicable council directives. These conditions aim to ensure that the product is reliable and safe. Products that are “produced for incorporation in a permanent manner in construction works” fall under the Construction Products Directive. Hot-rolled steels covered by EN 10025: 2004 are used in such “works” and are therefore covered by the directive. For these products, Tata Steel’s test certificates bear the CE mark and Tata Steel has issued a certified Declaration of Performance (DoP). All the structural products produced by Tata Steel in Europe are CE-marked except for S185+AR.
Supply - product conditions
Hot-rolled steel can be supplied with these product conditions and finishes and with this surface treatment:
| Side/surface condition | non-pickled | pickled | pickled and oiled |
|---|---|---|---|
| Mill edges | Yes | Yes | Yes |
| Trimmed edges | - | Yes | Yes |
Trimmed edges available in thicknesses up to 5.0 mm.
Please contact us regarding other specifications we may have that meet your needs.
Surface aspects
| Description | Availability |
|---|---|
| Surface finish | Coils are available in non-pickled and pickled finish for most grades. For grade specific availability, please refer to the dimensional tables. |
| Oiling | Pickled finish is available with rolling or preservative oil applied. Oil weight normally 0.4-1.8 g/m2 |
Alternative oiling ranges are available.
Please contact us for details.
Certification
Test certificates 2.2/3.1/3.2 are available according to EN 10204.
EN-Product-Hot-rolled-All grades Surface aspects Supply Conditions TSUK
Supply - product conditions
Hot-rolled steel can be supplied with these product conditions and finishes and with this surface treatment:
| Side/surface condition | non-pickled | pickled | pickled and oiled |
|---|---|---|---|
| Mill edges | Yes | Yes | Yes |
| Trimmed edges | - | Yes | Yes |
Trimmed edges available in thicknesses up to 5.0 mm.
Please contact us regarding other specifications we may have that meet your needs.
Surface aspects
| Description | Availability |
|---|---|
| Surface finish | Coils are available in non-pickled and pickled finish for most grades. For grade specific availability, please refer to the dimensional tables. |
| Oiling | Pickled finish is available with rolling or preservative oil applied. Oil weight normally 0.4-1.8 g/m2 |
Alternative oiling ranges are available.
Please contact us for details.
Certification
Test certificates 2.2/3.1 are available according to EN 10204.
EN-Product-Hot-Rolled-Structural Steel-S355JR/J0/J2/K2-Properties TSUK
Mechanical Properties
The values shown for strength and elongation in the table below are for test pieces taken transverse to the rolling direction; those for the impact test are for test pieces taken in the rolling direction.
| EN 10025-2: 2004 | Grade | S355JR/J0/J0W/J2/J2W/K2 | |
|---|---|---|---|
| Min. yield strength 1, 2 | ReH (N/mm2) | t ≤ 16 | 355 |
| 16 < t ≤ 20 | 345 | ||
| Tensile strength | Rm (N/mm2) | t < 3 | 510 - 680 |
| 3 ≤ t ≤ 20 | 470 - 630 | ||
| Elongation | % | 1.5 < t ≤ 2 | 14 |
| 2 < t ≤ 2.5 | 15 | ||
| 2.5 < t < 3 | 16 | ||
| 3 ≤ t ≤ 20 | 20 | ||
| JR3/J0/J0W/J2/J2W/K2 | |||
| Impact test | Temp. °C | 20 / 0 / -20 / -20 | |
| Min. energy J | 27 / 27 / 27 / 40 |
1. Upper yield strength or 0.2% proof stress applies.
2. For thicknesses > 16 mm, the ReH value is decreased by 10 N/mm2.
3. The impact properties of quality JR products are verified only when specified at the time of enquiry or order.
Impact strengths apply to thicknesses > 6 mm and are for standard test pieces only. Please contact us for details.
For the mechanical properties of cold-forming qualities, please consult us.
Tensile tests may be carried out on non-proportional test pieces as specified in EN 10025-1: 2004.
Elongation after fracture A uses test piece length L0 = 80 mm for t < 3 mm. L0 = 5.65√S0 for t ≥ 3 mm.
t – material thickness in mm.
Chemical composition
Structural steel meets the requirements of the cast analysis in the standard, as shown in the table below.
The steel grades supplied by Tata Steel are always fully killed.
Tata Steel does not supply steel with increased copper content.
| Grade | S355JR | S355K2 | S355J0W/J2W | |
|---|---|---|---|---|
| C | Max. | 0.24 | 0.2 | 0.16 |
| Mn | Max. | 1.6 | 1.6 | 1.5 |
| P | Max. | 0.035 | 0.025 | 0.025 |
| S | Max. | 0.035 | 0.025 | 0.008 |
| Si | Max. | 0.55 | 0.55 | 0.5 |
| N | Max. | 0.012 | - | 0.012 |
| Cu | Max. | 0.55 | 0.55 | 0.4 |
The maximum value for nitrogen does not apply if the chemical composition shows a minimum total aluminium content of 0.020% or if sufficient other nitrogen-binding elements are present.
The nitrogen-binding elements shall be mentioned in the inspection document.
For the chemical composition of cold-forming qualities, please consult us.
The chemical composition of steels suitable for galvanising complies with EN 10025-2: 2004.
All values are in weight%.
Suitability for cold forming
If chemistry suitable for cold forming (+C) is required, this must be specified when the material is ordered.
Cold forming cannot be guaranteed for structural steel that is not specified as cold-formable.
Suitability for galvanising
If chemistry suitable for post-galvanising (Class 1) is required, this must be specified when the material is ordered.
As standard, grades S355JR+AR and S355J2(C)+N in thickness 25 mm are supplied with such a chemistry.
EN-Product-Hot-Rolled-Structural Steel-S355-Dimensions TSUK
Dimensional capability - non-pickled
Dimensions in mm.
| Thickness | Max. width |
|---|---|
| From - up to | S355JR/J0/J2/K2 |
| 1.80 - 2.00 | 1250 |
| 2.00 - 2.20 | 1300 |
| 2.20 - 2.60 | 1520 |
| 2.60 - 3.00 | 1560 |
| 3.00 - 5.00 | 1830 |
| 5.00 - 16.00 | 1600 |
S355K2 is available in the as-rolled (+AR) condition.
S355JR/J0/J2 available in the as-rolled (+AR), normalised rolling (+N) and suitable for cold forming (C) conditions.
The minimum width is 900 mm.
For products produced in the Netherlands click here.
| Thickness | Max. width |
|---|---|
| From - up to | S355J0W/J2W |
| 5.00 - 6.00 | 1310 |
| 6.00 - 16.00 | 1600 |
S355JOW/J2W are available in the as-rolled (+AR) condition.
The minimum width is 900 mm.
For products produced in the Netherlands click here.
Dimensional capability - pickled
Dimensions in mm.
| Thickness | Max. width |
|---|---|
| From - up to | S355JR/J0/J2/K2 |
| 1.80 - 2.00 | 1250 |
| 2.00 - 2.20 | 1300 |
| 2.20 - 2.60 | 1520 |
| 2.60 - 5.00 | 1530 |
S355K2 is available in the as-rolled (+AR) condition.
S355JR/J0/J2 available in the as-rolled (+AR), normalised rolling (+N) and suitable for cold forming (C) conditions.
The minimum width is 900 mm.
For products produced in the Netherlands click here.
Tolerances
Tolerances for wide strip and slit wide strip comply with standard EN 10051: 2010.
Tighter tolerances are available, please contact us.
EN-Product-Hot-rolled-All grades Shape and dimensional tolerances TSUK
Shape and dimensional tolerances
The specified values for wide strip do not apply to the uncropped ends of the coil (‘head’ and ‘tail’). The length of these uncropped ends is calculated using the following formula:
length (in metres) = 90/nominal thickness (in mm), with a maximum of 20 metres.
If required, this part of the coil can be removed, however an additional cost may be charged for this.
Tolerances on thickness
Tata Steel can supply to full thickness tolerance specified in EN 10051:2010.
Tighter tolerances are available as shown below:
| Product family | Thickness tolerances available (% of full EN 10051:2010 tolerance) | |||
|---|---|---|---|---|
| 100% | 75% | 66% | 50% | |
| Steel for forming | Yes | Yes | Yes | (see note 1) |
| High-strength low-alloy (HSLA) | Yes | Yes | Yes | Yes |
| AHSS | Yes | Yes | Yes | Yes |
| Structural steel | Yes | Yes | Yes | Yes |
| Boron manganese steel | Yes | Yes | Yes | |
| Steel for gas cylinders | Yes | |||
1 Please contact us for tolerances below 66%
Please contact us on the availability of special tolerances to meet your requirements.
Tolerances on thickness for hot-rolled steel with a low carbon content for cold forming
(DD11-DD14 in EN 10111:2008)
| Nominal thickness | Tolerances for a nominal width of | ||||
|---|---|---|---|---|---|
| ≤ 1200 | > 1200 | > 1500 | > 1800 | ||
| ≤ 1500 | ≤ 1800 | ||||
| ≤ 2.00 | ± 0.13 | ± 0.14 | ± 0.16 | - | |
| > 2.00 | ≤ 2.50 | ± 0.14 | ± 0.16 | ± 0.17 | ± 0.19 |
| > 2.50 | ≤ 3.00 | ± 0.15 | ± 0.17 | ± 0.18 | ± 0.20 |
| > 3.00 | ≤ 4.00 | ± 0.17 | ± 0.18 | ± 0.20 | ± 0.20 |
| > 4.00 | ≤ 5.00 | ± 0.18 | ± 0.20 | ± 0.21 | ± 0.22 |
| > 5.00 | ≤ 6.00 | ± 0.20 | ± 0.21 | ± 0.22 | ± 0.23 |
| > 6.00 | ≤ 8.00 | ± 0.22 | ± 0.23 | ± 0.23 | ± 0.26 |
| > 8.00 | ≤ 11.00 | ± 0.24 | ± 0.25 | ± 0.25 | ± 0.28 |
All dimensions are mm.
Tolerances on thickness of steel grades with a specified minimum yield strength
Re ≤ 300 N/mm2 (category A)
| Nominal thickness | Tolerances for a nominal width of | ||||
|---|---|---|---|---|---|
| ≤ 1200 | > 1200 | > 1500 | > 1800 | ||
| ≤ 1500 | ≤ 1800 | ||||
| ≤ 2.00 | ± 0.17 | ± 0.19 | ± 0.21 | - | |
| > 2.00 | ≤ 2.50 | ± 0.18 | ± 0.21 | ± 0.23 | ± 0.25 |
| > 2.50 | ≤ 3.00 | ± 0.20 | ± 0.22 | ± 0.24 | ± 0.26 |
| > 3.00 | ≤ 4.00 | ± 0.22 | ± 0.24 | ± 0.26 | ± 0.27 |
| > 4.00 | ≤ 5.00 | ± 0.24 | ± 0.26 | ± 0.28 | ± 0.29 |
| > 5.00 | ≤ 6.00 | ± 0.26 | ± 0.28 | ± 0.29 | ± 0.31 |
| > 6.00 | ≤ 8.00 | ± 0.29 | ± 0.30 | ± 0.31 | ± 0.35 |
| > 8.00 | ≤ 10.00 | ± 0.32 | ± 0.33 | ± 0.34 | ± 0.40 |
| > 10.00 | ≤ 12.50 | ± 0.35 | ± 0.36 | ± 0.37 | ± 0.43 |
| > 12.50 | ≤ 15.00 | ± 0.37 | ± 0.38 | ± 0.40 | ± 0.46 |
| > 15.00 | ≤ 25.00 | ± 0.40 | ± 0.42 | ± 0.45 | ± 0.50 |
All dimensions are mm.
Tolerances on thickness of steel grades with a specified minimum yield strength
300 N/mm2 < Re ≤ 360 N/mm2 (category B)
| Nominal thickness | Tolerances for a nominal width of | ||||
|---|---|---|---|---|---|
| ≤ 1200 | > 1200 | > 1500 | > 1800 | ||
| ≤ 1500 | ≤ 1800 | ||||
| ≤ 2.00 | ± 0.20 | ± 0.22 | ± 0.24 | - | |
| > 2.00 | ≤ 2.50 | ± 0.21 | ± 0.24 | ± 0.26 | ± 0.29 |
| > 2.50 | ≤ 3.00 | ± 0.23 | ± 0.25 | ± 0.28 | ± 0.30 |
| > 3.00 | ≤ 4.00 | ± 0.25 | ± 0.28 | ± 0.30 | ± 0.31 |
| > 4.00 | ≤ 5.00 | ± 0.28 | ± 0.30 | ± 0.32 | ± 0.33 |
| > 5.00 | ≤ 6.00 | ± 0.30 | ± 0.32 | ± 0.33 | ± 0.36 |
| > 6.00 | ≤ 8.00 | ± 0.33 | ± 0.35 | ± 0.36 | ± 0.40 |
| > 8.00 | ≤ 10.00 | ± 0.37 | ± 0.38 | ± 0.39 | ± 0.46 |
| > 10.00 | ≤ 12.50 | ± 0.40 | ± 0.41 | ± 0.43 | ± 0.49 |
| > 12.50 | ≤ 15.00 | ± 0.43 | ± 0.44 | ± 0.46 | ± 0.53 |
| > 15.00 | ≤ 25.00 | ± 0.46 | ± 0.48 | ± 0.52 | ± 0.58 |
All dimensions are mm.
Tolerances on thickness of steel grades with a specified minimum yield strength
360 N/mm2 < Re ≤ 420 N/mm2 (category C)
| Nominal thickness | Tolerances for a nominal width of | ||||
|---|---|---|---|---|---|
| ≤ 1200 | > 1200 | > 1500 | > 1800 | ||
| ≤ 1500 | ≤ 1800 | ||||
| ≤ 2.00 | ± 0.22 | ± 0.25 | ± 0.27 | - | |
| > 2.00 | ≤ 2.50 | ± 0.23 | ± 0.27 | ± 0.30 | ± 0.33 |
| > 2.50 | ≤ 3.00 | ± 0.26 | ± 0.29 | ± 0.31 | ± 0.34 |
| > 3.00 | ≤ 4.00 | ± 0.29 | ± 0.31 | ± 0.34 | ± 0.35 |
| > 4.00 | ≤ 5.00 | ± 0.31 | ± 0.34 | ± 0.36 | ± 0.38 |
| > 5.00 | ≤ 6.00 | ± 0.34 | ± 0.36 | ± 0.38 | ± 0.40 |
| > 6.00 | ≤ 8.00 | ± 0.38 | ± 0.39 | ± 0.40 | ± 0.46 |
| > 8.00 | ≤ 10.00 | ± 0.42 | ± 0.43 | ± 0.44 | ± 0.52 |
| > 10.00 | ≤ 12.50 | ± 0.46 | ± 0.47 | ± 0.48 | ± 0.56 |
| > 12.50 | ≤ 15.00 | ± 0.48 | ± 0.49 | ± 0.52 | ± 0.60 |
| > 15.00 | ≤ 25.00 | ± 0.52 | ± 0.55 | ± 0.59 | ± 0.65 |
All dimensions are mm.
Tolerances on thickness of steel grades with a specified minimum yield strength
420 N/mm2 < Re ≤ 900 N/mm2 (category D)
| Nominal thickness | Tolerances for a nominal width of | ||||
|---|---|---|---|---|---|
| ≤ 1200 | > 1200 | > 1500 | > 1800 | ||
| ≤ 1500 | ≤ 1800 | ||||
| ≤ 2.00 | ± 0.24 | ± 0.27 | ± 0.29 | - | |
| > 2.00 | ≤ 2.50 | ± 0.25 | ± 0.29 | ± 0.32 | ± 0.35 |
| > 2.50 | ≤ 3.00 | ± 0.28 | ± 0.31 | ± 0.34 | ± 0.36 |
| > 3.00 | ≤ 4.00 | ± 0.31 | ± 0.34 | ± 0.36 | ± 0.38 |
| > 4.00 | ≤ 5.00 | ± 0.34 | ± 0.36 | ± 0.39 | ± 0.41 |
| > 5.00 | ≤ 6.00 | ± 0.36 | ± 0.39 | ± 0.41 | ± 0.43 |
| > 6.00 | ≤ 8.00 | ± 0.41 | ± 0.42 | ± 0.43 | ± 0.49 |
| > 8.00 | ≤ 10.00 | ± 0.45 | ± 0.46 | ± 0.48 | ± 0.56 |
| > 10.00 | ≤ 12.50 | ± 0.49 | ± 0.50 | ± 0.52 | ± 0.60 |
| > 12.50 | ≤ 15.00 | ± 0.52 | ± 0.53 | ± 0.56 | ± 0.64 |
| > 15.00 | ≤ 25.00 | ± 0.56 | ± 0.59 | ± 0.63 | ± 0.70 |
All dimensions are mm.
Tolerances on width
Tolerances in mm.
| Nominal width w | ||||
|---|---|---|---|---|
| Mill edges | Trimmed edges | |||
| lower | upper | lower | upper | |
| w ≤ 1200 | 0 | 20 | 0 | 3 |
| 1200 < w ≤ 1850 | 0 | 20 | 0 | 5 |
| w > 1850 | 0 | 25 | 0 | 6 |
Tolerances in mm for wide strip and slit wide strip
The tolerances for wide strip and slit wide strip comply with standard EN 10051:2010.
The specified values for wide strip do not apply to the uncropped ends of the coil (‘head’ and ‘tail’). The length of these uncropped ends is calculated using the following formula:
length (in metres) = 90/nominal thickness (in mm), with a maximum of 20 metres.
If required, this part of the coil can be removed, however an additional cost may be charged for this.
Edge camber
The deviation from the edge over a length of 5000mm:
• with mill edges, no more than 20mm
• with trimmed edges, no more than 15mm
Flatness
Requirements as regards flatness can be agreed at the time of enquiry.
Option for maximum crown values
The following high crown C40 options available for hot-rolled products.
Crown values on the C20-position as well as minimum crown values on both C20 and C40 position are also available on request.
Maximum Crown C40 in µm values for hot-rolled steel with a low carbon content for cold forming
(DD11-DD14 in EN 10111:2008)
Category 1 | C40 | ||||
|---|---|---|---|---|---|
| Nominal Thickness | ≤ 1200 | > 1200 | > 1500 | > 1800 | |
| ≤ 1500 | ≤ 1800 | ||||
| > 1.47 | ≤ 2.00 | 40 | 40 | 40 | 40 |
| > 2.00 | ≤ 2.50 | 40 | 40 | 50 | 50 |
| > 2.50 | ≤ 3.00 | 40 | 40 | 50 | 50 |
| > 3.00 | ≤ 6.00 | 40 | 50 | 50 | 50 |
| > 6.00 | ≤ 11.00 | 50 | 50 | 50 | 50 |
Maximum Crown C40 in µm values of structural steel grades
(S185-S235-S275 ≤ 10mm in EN 10025-2:2004)
| Category 2 | C40 | ||||
|---|---|---|---|---|---|
| Nominal Thickness | ≤ 1200 | > 1200 | > 1500 | > 1800 | |
| ≤ 1500 | ≤ 1800 | ||||
| > 1.47 | ≤ 2.00 | 40 | 40 | 40 | 40 |
| > 2.00 | ≤ 2.50 | 40 | 40 | 50 | 50 |
| > 2.50 | ≤ 20.00 | 50 | 50 | 50 | 50 |
Maximum Crown C40 in µm values of structural steel grades(S275 > 10mm in EN 10025-2:2004)
and HSLA grades (S315MC in EN 10149-2:1996)
Category 3 | C40 | ||||
|---|---|---|---|---|---|
| Nominal Thickness | ≤ 1200 | > 1200 | > 1500 | > 1800 | |
≤ 1500 | ≤ 1800 | ||||
| > 1.47 | ≤ 2.00 | 50 | 50 | 60 | 60 |
| > 2.00 | ≤ 2.50 | 50 | 60 | 60 | 60 |
| > 2.50 | ≤ 3.00 | 50 | 60 | 60 | 60 |
| > 3.00 | ≤ 20.00 | 60 | 60 | 70 | 70 |
Maximum Crown C40 in µm values of HSLA grades
(S355MC, S420MC, S460MC, S500MC, S550MC in EN 10149-2:1996)
| Category 4 | C40 | ||||
|---|---|---|---|---|---|
| Nominal Thickness | ≤ 1200 | > 1200 | > 1500 | > 1800 | |
| ≤ 1500 | ≤ 1800 | ||||
| > 1.47 | ≤ 2.00 | 60 | 70 | 70 | 70 |
| > 2.00 | ≤ 2.50 | 60 | 70 | 80 | 80 |
| > 2.50 | ≤ 3.00 | 60 | 70 | 80 | 80 |
| > 3.00 | ≤ 5.00 | 70 | 70 | 80 | 80 |
| > 5.00 | ≤ 20.00 | 80 | 80 | 80 | 80 |
Dimensions and coil weights
Tata Steel can supply hot-rolled steels with the following minimum and maximum dimensions and weights:
| Description | Availability |
|---|---|
| Coil diameter inner non-pickled | 762mm |
| Coil diameter inner pickled | 610mm standard |
| Tolerance on inner diameter | +0/-50mm |
| Coil diameter outer non-pickled | Outer diameter available is 10/7 x width |
| to reduce possibility of coil tipping over | |
| Max. 2200mm | |
| Min. 1050mm | |
| Coil diameter outer pickled and oiled | Outer diameter available is 10/7 x width |
| to reduce possibility of coil tipping over | |
| Outer diameter | |
| limit 2200mm | |
| Min. 1050mm | |
| Coil weight | Max. 32 tonnes |
| Additional maximum limits from transport | |
| limits and outer coil diameter | |
| Some HR products may have different | |
| coil weight ranges | |
| Minimum tonnage per order | Please refer to price list for order quantity details |
| Minimum order quantities may apply |
EN-Product-Hot-rolled-Heavy+Light further processing TSUK
Further processing
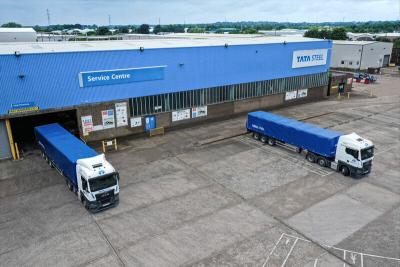
We have a broad network of Tata Steel service centres across Europe, offering decoiling and slitting services from stock and against short lead times.
Heavy gauge processing
| Processing type | Decoiling |
|---|---|
| Thickness range (mm) | 1.4 - 25.4 |
| Width range (mm) | 300 - 2600 |
| Length range | up to 18.4m |
| Locations | UK Netherlands |
Light gauge processing
| Processing type | Slitting | Decoiling | Blanking |
|---|---|---|---|
| Thickness range (mm) | 0.2 - 7.0 | 0.3 - 6.0 | 0.3 - 6.0 |
| Width range (mm) | 10 - 2050 | 50 - 2600 | 200 - 2600 |
| Length range | - | up to 6m | up to 6m |
| Locations | UK Ireland Netherlands Germany France Spain Sweden Norway Finland | UK Ireland Netherlands Germany France Spain Sweden Norway Finland | UK Ireland |
For further information please visit our Service Centre webpages.
EN-Product-Hot-Rolled-Structural steel-All grades Downloads TSUK
Download:


