Steel for forming
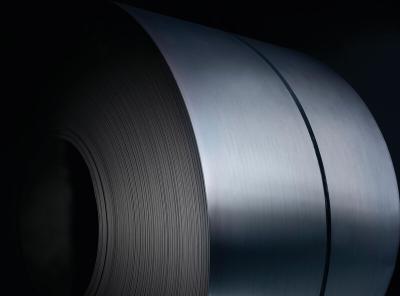
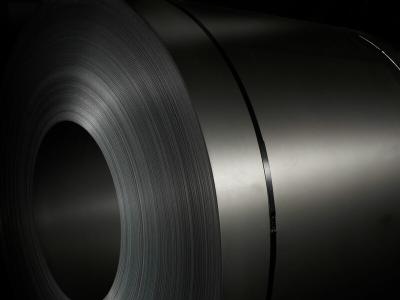
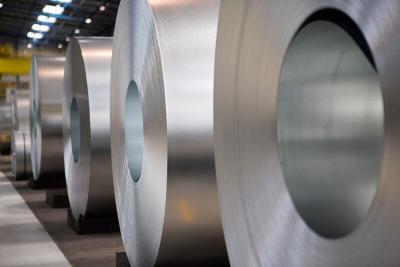
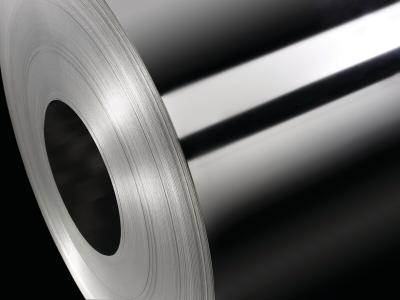
Cold-rolled steel for cold forming and deep drawing is available in a range of grades. Each grade is designed for particular applications – allowing you to pick the best steel for your product.
Our forming steel is available in a choice of widths up to 72 inch and thicknesses up to 0.12 inch. This provides opportunities for cutting waste and maximising yield. These products are made using one of two process routes:
- continuous annealing (CA)
- batch annealing (BA)
Applications
- Automotive components and body panels
- Components for building
- Domestic appliances
- Electrical goods
- Furniture
- Radiators
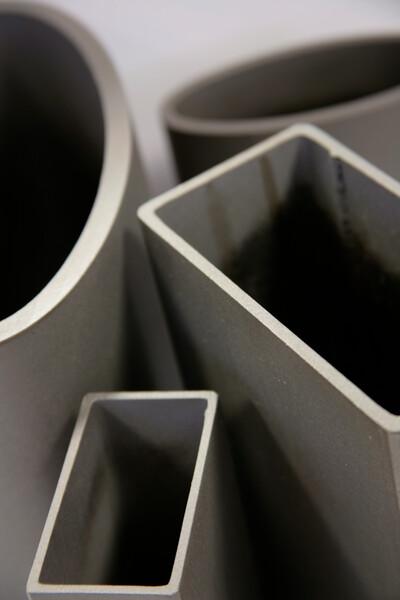
- Tubes
EN_US-Product-Cold-Rolled-Forming-CS TYPE AB TSUK
EN_US-Product-Cold-rolled-Forming-All Grades Overview TSUK
Our forming steel is available in a choice of widths up to 72 inch and thicknesses up to 0.12 inch. This provides opportunities for cutting waste and maximising yield.These products are made using one of two process routes:
- continuous annealing (CA) up to 0.06 inch
- batch annealing (BA) up to 0.12 inch
Applications
- Automotive components and body panels
- Building components
- Domestic appliances
- Electrical goods
- Furniture
- Radiators
- Tubes
- Drums
- Coins
Relationship with standards
Cold-rolled steel for forming complies with ASTM A1008: 2013 and is available in the grades shown below.
ASTM A1008: 2013 |
---|
Grade |
CS TYPE A |
CS TYPE B |
DS TYPE A |
DS TYPE B |
DDS |
EDDS |
For products produced in the Netherlands click here.
EN_US-Product-Cold-rolled-All Grades Surface aspects TSUK
Surface aspects
Surface quality according to ASTM A1008: 2013 and ASTM A568: 2011.
Surface quality class 1 (exposed):
The better side must be free of defects that can spoil the uniform appearance of a high-quality paint or of an electrolytic coating. The other side must at least conform to surface quality unexposed.
Surface quality class 2 (unexposed):
Defects that do not influence the formability or the application of surface coatings are permitted. These are defects such as pores, minor scratches, slight indentations, small grooves or slight discolouration.
Inspected side
As a rule, the upper side of the strip is inspected; on request, the strip can be wound so that the inspected side is the underside.
Surface texture/roughness
Cold-rolled annealed and skin passed steel is available with ‘Regular matte’ surface texture.
Description | Roughness µinch CLA |
---|---|
Regular matte | 24 - 76 |
Preservative oil
The standard oil applied by Tata Steel acts as a protective coating. Other types of oil may be available to meet your requirement.
Tata Steel offers a range of oiling levels, 37-241 mg/ft2 per side. Please specify your exact requirements in the enquiry.
Other oiling levels are available on request. Tata Steel is not responsible for the risk of corrosion during storage or shipment if material is ordered in the unoiled condition.
Surface cleanliness
Tata Steel can guarantee improved surface cleanliness on request for batch annealed products. The cleanliness is tested with a tape test, in which the loss of reflection is measured.
The reflection gives an indication of the oil residue on the annealed product.
Continuously annealed products typically exhibit a loss of reflection up to around 10%.
EN_US-Product-Cold-Rolled-Forming-CS TYPE AB-Dimensions TSUK
Dimensions
For continuously annealed (CA) products.
Dimensions in inches.
Thickness | Max. width |
---|---|
From - up to | CS Type A CS Type B |
0.014 - 0.018 | 55 |
0.018 - 0.019 | 58 |
0.019 - 0.020 | 60 |
0.020 - 0.024 | 61 |
0.024 - 0.030 | 67 |
0.030 - 0.063 | 72 |
0.063 - 0.067 | 69 |
0.067 - 0.071 | 65 |
0.071 - 0.075 | 60 |
0.075 - 0.077 | 60 |
0.077 - 0.079 | 59 |
Minimum width is 32 inch
For batch annealed (BA) products.
Dimensions in inches.
Thickness | Max. width |
---|---|
From - up to | CS Type B |
0.014 - 0.015 | 51 |
0.015 - 0.018 | 55 |
0.018 - 0.020 | 58 |
0.020 - 0.024 | 61 |
0.024 - 0.030 | 67 |
0.030 - 0.063 | 72 |
0.063 - 0.067 | 69 |
0.067 - 0.070 | 65 |
0.070 - 0.118 | 61 |
Minimum width is 28 inch
For products produced in the Netherlands click here.
EN-Product-Cold-rolled-All Grades Shape and Dimensional TolerancesTSUK
Tolerances on shape and dimensions comply with standard EN 10131: 2006
Tolerances on thickness
Tolerance (EN 10131: 2006) | Availability |
---|---|
Full thickness tolerance | Available |
Special thickness tolerances | Available |
50% of full thickness tolerance | Refer before ordering |
Tolerances closer than special tolerances may be agreed at the time of enquiry.
Tolerances in mm.
Tolerances on thickness for steel grades with a specified minimum yield strength
Re < 260N/mm2.
Nominal | Normal tolerances for a nominal width of 1 | Special tolerances (S) for a | |||||
---|---|---|---|---|---|---|---|
| ≤ 1200 | > 1200 | > 1500 | ≤ 1200 | > 1200 | > 1500 | |
| ≤ 1500 |
|
| ≤ 1500 |
| ||
≥ 0.35 | ≤ 0.40 | ± 0.03 | ± 0.04 | ± 0.05 | ± 0.020 | ± 0.025 | ± 0.030 |
> 0.40 | ≤ 0.60 | ± 0.03 | ± 0.04 | ± 0.05 | ± 0.025 | ± 0.030 | ± 0.035 |
> 0.60 | ≤ 0.80 | ± 0.04 | ± 0.05 | ± 0.06 | ± 0.030 | ± 0.035 | ± 0.040 |
> 0.80 | ≤ 1.00 | ± 0.05 | ± 0.06 | ± 0.07 | ± 0.035 | ± 0.040 | ± 0.050 |
> 1.00 | ≤ 1.20 | ± 0.06 | ± 0.07 | ± 0.08 | ± 0.040 | ± 0.050 | ± 0.060 |
> 1.20 | ≤ 1.60 | ± 0.08 | ± 0.09 | ± 0.10 | ± 0.050 | ± 0.060 | ± 0.070 |
> 1.60 | ≤ 2.00 | ± 0.10 | ± 0.11 | ± 0.12 | ± 0.060 | ± 0.070 | ± 0.080 |
> 2.00 | ≤ 2.50 | ± 0.12 | ± 0.13 | ± 0.14 | ± 0.080 | ± 0.090 | ± 0.100 |
> 2.50 | ≤ 3.00 | ± 0.15 | ± 0.15 | ± 0.16 | ± 0.100 | ± 0.110 | ± 0.120 |
1. Around cold-rolled welds - the pickling welds - an increase of 20% at the most over the thickness
is allowed over a length of 15 metres.
2. For special tolerances, not all combinations of thickness and width are available in every product.
Please contact us for more details.
Tolerances on thickness for steel grades with a specified minimum yield strength
260 N/mm2 ≤ Re < 340N/mm2.
Nominal | Normal tolerances for a nominal width of 1 | Special tolerances (S) for a | |||||
---|---|---|---|---|---|---|---|
| ≤ 1200 | > 1200 | > 1500 | ≤ 1200 | > 1200 | > 1500 | |
| ≤ 1500 |
|
| ≤ 1500 |
| ||
≥ 0.35 | ≤ 0.40 | ± 0.04 | ± 0.05 | ± 0.06 | ± 0.025 | ± 0.030 | ± 0.035 |
> 0.40 | ≤ 0.60 | ± 0.04 | ± 0.05 | ± 0.06 | ± 0.030 | ± 0.035 | ± 0.040 |
> 0.60 | ≤ 0.80 | ± 0.05 | ± 0.06 | ± 0.07 | ± 0.035 | ± 0.040 | ± 0.050 |
> 0.80 | ≤ 1.00 | ± 0.06 | ± 0.07 | ± 0.08 | ± 0.040 | ± 0.050 | ± 0.060 |
> 1.00 | ≤ 1.20 | ± 0.07 | ± 0.08 | ± 0.10 | ± 0.050 | ± 0.060 | ± 0.070 |
> 1.20 | ≤ 1.60 | ± 0.09 | ± 0.11 | ± 0.12 | ± 0.060 | ± 0.070 | ± 0.080 |
> 1.60 | ≤ 2.00 | ± 0.12 | ± 0.13 | ± 0.14 | ± 0.070 | ± 0.080 | ± 0.100 |
> 2.00 | ≤ 2.50 | ± 0.14 | ± 0.15 | ± 0.16 | ± 0.100 | ± 0.110 | ± 0.120 |
> 2.50 | ≤ 3.00 | ± 0.17 | ± 0.18 | ± 0.18 | ± 0.120 | ± 0.130 | ± 0.140 |
1. Around cold-rolled welds - the pickling welds - an increase of 20% at the most over the thickness
is allowed over a length of 15 metres.
2. For special tolerances, not all combinations of thickness and width are available in every product.
Please contact us for more details.
Tolerances on thickness for steel grades with a specified minimum yield strength
340N/mm2 ≤ Re ≤ 420N/mm2.
Nominal | Normal tolerances for a nominal width of 1 | Special tolerances (S) for a | |||||
---|---|---|---|---|---|---|---|
| ≤ 1200 | > 1200 | > 1500 | ≤ 1200 | > 1200 | > 1500 | |
| ≤ 1500 |
|
| ≤ 1500 |
| ||
≥ 0.35 | ≤ 0.40 | ± 0.04 | ± 0.05 | ± 0.06 | ± 0.030 | ± 0.035 | ± 0.040 |
> 0.40 | ≤ 0.60 | ± 0.05 | ± 0.06 | ± 0.07 | ± 0.035 | ± 0.040 | ± 0.050 |
> 0.60 | ≤ 0.80 | ± 0.06 | ± 0.07 | ± 0.08 | ± 0.040 | ± 0.050 | ± 0.060 |
> 0.80 | ≤ 1.00 | ± 0.07 | ± 0.08 | ± 0.10 | ± 0.050 | ± 0.060 | ± 0.070 |
> 1.00 | ≤ 1.20 | ± 0.09 | ± 0.10 | ± 0.11 | ± 0.060 | ± 0.070 | ± 0.080 |
> 1.20 | ≤ 1.60 | ± 0.11 | ± 0.12 | ± 0.14 | ± 0.070 | ± 0.080 | ± 0.100 |
> 1.60 | ≤ 2.00 | ± 0.14 | ± 0.15 | ± 0.17 | ± 0.080 | ± 0.100 | ± 0.110 |
> 2.00 | ≤ 2.50 | ± 0.16 | ± 0.18 | ± 0.19 | ± 0.110 | ± 0.120 | ± 0.130 |
> 2.50 | ≤ 3.00 | ± 0.20 | ± 0.20 | ± 0.21 | ± 0.130 | ± 0.140 | ± 0.150 |
1. Around cold-rolled welds - the pickling welds - an increase of 20% at the most over the thickness
is allowed over a length of 15 metres.
2. For special tolerances, not all combinations of thickness and width are available in every product.
Please contact us for more details.
Tolerances on thickness for steel grades with a specified minimum yield strength
Re > 420N/mm2.
Nominal | Normal tolerances for a nominal width of 1 | Special tolerances (S) for a | |||||
---|---|---|---|---|---|---|---|
| ≤ 1200 | > 1200 | > 1500 | ≤ 1200 | > 1200 | > 1500 | |
| ≤ 1500 |
|
| ≤ 1500 |
| ||
≥ 0.35 | ≤ 0.40 | ± 0.05 | ± 0.06 | ± 0.07 | ± 0.035 | ± 0.040 | ± 0.050 |
> 0.40 | ≤ 0.60 | ± 0.05 | ± 0.07 | ± 0.08 | ± 0.040 | ± 0.050 | ± 0.060 |
> 0.60 | ≤ 0.80 | ± 0.06 | ± 0.08 | ± 0.10 | ± 0.050 | ± 0.060 | ± 0.070 |
> 0.80 | ≤ 1.00 | ± 0.08 | ± 0.10 | ± 0.11 | ± 0.060 | ± 0.070 | ± 0.080 |
> 1.00 | ≤ 1.20 | ± 0.10 | ± 0.11 | ± 0.13 | ± 0.070 | ± 0.080 | ± 0.100 |
> 1.20 | ≤ 1.60 | ± 0.13 | ± 0.14 | ± 0.16 | ± 0.080 | ± 0.100 | ± 0.110 |
> 1.60 | ≤ 2.00 | ± 0.16 | ± 0.17 | ± 0.19 | ± 0.100 | ± 0.110 | ± 0.130 |
> 2.00 | ≤ 2.50 | ± 0.19 | ± 0.20 | ± 0.22 | ± 0.130 | ± 0.140 | ± 0.160 |
> 2.50 | ≤ 3.00 | ± 0.22 | ± 0.23 | ± 0.24 | ± 0.160 | ± 0.170 | ± 0.180 |
1. Around cold-rolled welds - the pickling welds - an increase of 20% at the most over the thickness
is allowed over a length of 15 metres.
2. For special tolerances, not all combinations of thickness and width are available in every product.
Please contact us for more details.
Tolerances on width
Tolerance | Availability |
---|---|
Normal width tolerances | Available |
Special width tolerances | Refer (± 0.50 mm available on 750 - 2000 mm width) |
Nominal width w | Normal tolerances | Special tolerances (S) | ||
---|---|---|---|---|
| Under | Over | Under | Over |
w ≤ 1200 | 0 | 4 | 0 | 2 |
1200 < w ≤ 1500 | 0 | 5 | 0 | 2 |
w > 1500 | 0 | 6 | 0 | 3 |
Out-of-squareness (products supplied as cut sheets only)
The deviation does not exceed 1% of the actual width of the sheet according to the EN 10131: 2006 standard. The deviation from the edge camber does not exceed 5mm for a length of 2 metres as specified in EN 10131: 2006.
Flatness (products supplied as skin-passed cut sheets only)
Flatness complies with EN 10131: 2006
If there is a dispute about the flatness of material that was ordered to the special tolerances shown in table 8 of EN 10131: 2006, then the minimum acceptable standards of flatness described below must be verified.
Criteria in case of disputes over special (FS) flatness tolerances (ReL < 260 N/mm2)
Dimensions in mm.
Nominal width | Edge-wave length | Maximum acceptable wave height |
---|---|---|
< 1500 | > 200 | < 1% of edge-wave length |
≥ 1500 | > 200 | < 1.5% of edge-wave length |
– | < 200 | 2mm |
Winding
For winding, there may be a maximum width gap of 3mm between two consecutive windings. The total width stagger across the coil wall will not exceed 10mm.
Dimensions and coil weights
Tata Steel can supply cold-rolled steel with the following minimum and maximum dimensions and coil weights.
Description | Availability |
---|---|
Coil diameter inner | 610mm |
(508mm available on request) | |
Coil diameter outer | 10/7 x width max |
1000mm min. | |
2800mm max. | |
Coil weight | 30 t max. |
30 - 45 t max available after consultation | |
Coil weight limited by maximum outer diameter | |
Maximum weight allowed by road/rail transport | |
Some products may have different coil weight ranges available | |
Usually a minimum coil weight up to 85% of the maximum coil weight can be requested | |
KIM: width ≤ 1200mm | 11.9 - 21.5 kg/mm width |
KIM: 1200mm < width ≤ 1700mm | 11.9 - 21 kg/mm width |
KIM: width > 1700mm | 10.3 kg/mm width and 11.9 - 21 kg/mm width |
Minimum tonnage per order | Refer to price list for order quantity details |
Minimum order quantities may apply |
Coil welds
For batch-annealed coils, in general, pickling line welds are included. The number of permissible recoiling line welds is determined in consultation with the customer. If welds are permitted, Tata Steel is better able to implement the best coil weight. A recoiling line weld is marked with a single hole in the centre of the strip, close to the weld. On request the identifying hole can be left out. Coils with welds are available on continuously-annealed products – please contact us for details. You can find details on how to get in touch with us in 'Contact Us' below.
EN_US-Product-Cold-Rolled-Forming-DS TYPE AB TSUK
EN_US-Product-Cold-rolled-Forming-All Grades Overview TSUK
Our forming steel is available in a choice of widths up to 72 inch and thicknesses up to 0.12 inch. This provides opportunities for cutting waste and maximising yield.These products are made using one of two process routes:
- continuous annealing (CA) up to 0.06 inch
- batch annealing (BA) up to 0.12 inch
Applications
- Automotive components and body panels
- Building components
- Domestic appliances
- Electrical goods
- Furniture
- Radiators
- Tubes
- Drums
- Coins
Relationship with standards
Cold-rolled steel for forming complies with ASTM A1008: 2013 and is available in the grades shown below.
ASTM A1008: 2013 |
---|
Grade |
CS TYPE A |
CS TYPE B |
DS TYPE A |
DS TYPE B |
DDS |
EDDS |
For products produced in the Netherlands click here.
EN_US-Product-Cold-rolled-All Grades Surface aspects TSUK
Surface aspects
Surface quality according to ASTM A1008: 2013 and ASTM A568: 2011.
Surface quality class 1 (exposed):
The better side must be free of defects that can spoil the uniform appearance of a high-quality paint or of an electrolytic coating. The other side must at least conform to surface quality unexposed.
Surface quality class 2 (unexposed):
Defects that do not influence the formability or the application of surface coatings are permitted. These are defects such as pores, minor scratches, slight indentations, small grooves or slight discolouration.
Inspected side
As a rule, the upper side of the strip is inspected; on request, the strip can be wound so that the inspected side is the underside.
Surface texture/roughness
Cold-rolled annealed and skin passed steel is available with ‘Regular matte’ surface texture.
Description | Roughness µinch CLA |
---|---|
Regular matte | 24 - 76 |
Preservative oil
The standard oil applied by Tata Steel acts as a protective coating. Other types of oil may be available to meet your requirement.
Tata Steel offers a range of oiling levels, 37-241 mg/ft2 per side. Please specify your exact requirements in the enquiry.
Other oiling levels are available on request. Tata Steel is not responsible for the risk of corrosion during storage or shipment if material is ordered in the unoiled condition.
Surface cleanliness
Tata Steel can guarantee improved surface cleanliness on request for batch annealed products. The cleanliness is tested with a tape test, in which the loss of reflection is measured.
The reflection gives an indication of the oil residue on the annealed product.
Continuously annealed products typically exhibit a loss of reflection up to around 10%.
EN_US-Product-Cold-Rolled-Forming-DS TYPE AB-Dimensions TSUK
Dimensions
For batch annealed (BA) products.
Dimensions in inches.
Thickness | Max. width |
---|---|
From - up to | DS Type A and B |
0.014 - 0.020 | 52 |
0.020 - 0.022 | 55 |
0.022 - 0.024 | 60 |
0.024 - 0.026 | 63 |
0.026 - 0.028 | 64 |
0.028 - 0.030 | 65 |
0.030 - 0.063 | 71 |
0.063 - 0.067 | 69 |
0.067 - 0.070 | 65 |
0.070 - 0.118 | 61 |
Minimum width is 28 inch.
For products produced in the Netherlands click here.
EN_US-Product-Cold-rolled-All grades Shape and dimensional tolerances TSUK
Shape and dimensional tolerances
Tolerances on thickness
Tata Steel can supply to full thickness tolerance specified in ASTM A568: 2015.
Thickness tolerances over, no tolerance under. Tighter tolerances are available as shown below:
Specified Width, in. | Thickness tolerances available | ||
---|---|---|---|
ASTM A 568 (2019) | |||
From - up to | To 15, incl | Over 15 to 72, incl | Over 72 |
To 0.014, excl | 0.001 | 0.001 | ... |
0.014 to 0.019, incl | 0.002 | 0.002 | ... |
Over 0.019A to 0.039, incl | 0.003 | 0.003 | 0.003 |
Over 0.039 to 0.057,incl | 0.004 | 0.004 | 0.004 |
Over 0.057 to 0.071,incl | 0.005 | 0.005 | 0.005 |
Over 0.071 to 0.098, incl | 0.005 | 0.005 | 0.006 |
Over 0.098 to 0.142, incl | 0.005 | 0.006 | 0.007 |
Minimum thickness, 0.021 in. for high-strength, low-alloy.
The specified thickness range captions apply independent of whether the ordered thickness is stated as a nominal or minimum.
The tolerances provided in the table are based on minimum thickness (tolerance over, no tolerance under).
For nominal thickness, the tolerance is divided equally over and under.
Tolerances on width, edge camber and flatness
Material will be supplied conforming to the tolerances specified in ASTM A568 (2007) / A635 (2007).
Width tolerances are over, no tolerance under.
Width tolerances available | ||
---|---|---|
Specified Width, in. | ASTM A568: 2019 | |
To 6, incl | Over 6 to 9, inc | Over 9 to 12, inc |
0.012 | 0.016 | 0.032 |
0.020 in. minimum thickness for high-strength low-alloy.
Camber Tolerances available ASTM A568: 2019 |
---|
Specified Width, in. |
To 12, incl |
1⁄4 in. in any 8 ft |
0.020 in. minimum thickness for high-strength low-alloy.
Flatness tolerances Under Specified Yield Point, min, 45ksi ASTM A568: 2019 | ||
---|---|---|
Specified Width, in. | Specified Thickness, in. | |
To 0.044, incl | Over 0.044 | |
to 36 incl | 3⁄8 | - |
over 36 to 60 incl | 5⁄8 | - |
over 60 | 7⁄8 | - |
to 36 incl | - | 1⁄4 |
over 36 to 60 incl | - | 3⁄8 |
over 60 to 72 incl | - | 5⁄8 |
over 72 | - | 7⁄8 |
Flatness tolerances Under Specified Yield Point, min, 45 to 50 incl. ASTM A568: 2019 | ||
---|---|---|
Specified Width, in. | Specified Thickness, in. | |
To 0.044, incl | Over 0.044 | |
to 36 incl | 3⁄4 | - |
over 36 to 60 incl | 1 1⁄8 | - |
over 60 | 1 1⁄2 | - |
to 36 incl | - | 3⁄4 |
over 36 to 60 incl | - | 3⁄4 |
over 60 to 72 incl | - | 1 1⁄8 |
over 72 | - | 1 1⁄2 |
Maximum deviation from a horizontal flat surface
Tolerances for high-strength, low-alloy steel with specified minimum yield point in excess of 50 ksi are subject to negotiation.
Dimensions and coil weights
Tata Steel can supply hot-rolled steels with the following minimum and maximum dimensions and weights.
Description | Availability |
---|---|
Coil diameter inner | 24 inch |
Coil diameter outer | 83 inch max. |
Coil weight | 66,000 Ibs max. |
Coil weight limited by maximum outer diameter | |
Maximum weight allowed by road/rail transport | |
Some products may have different coil weight ranges available | |
Minimum tonnage per order | Refer to price list for order quantity details |
Minimum order quantities may apply |
EN_US-Product-Cold-Rolled-Forming-DDS TSUK
EN_US-Product-Cold-rolled-Forming-All Grades Overview TSUK
Our forming steel is available in a choice of widths up to 72 inch and thicknesses up to 0.12 inch. This provides opportunities for cutting waste and maximising yield.These products are made using one of two process routes:
- continuous annealing (CA) up to 0.06 inch
- batch annealing (BA) up to 0.12 inch
Applications
- Automotive components and body panels
- Building components
- Domestic appliances
- Electrical goods
- Furniture
- Radiators
- Tubes
- Drums
- Coins
Relationship with standards
Cold-rolled steel for forming complies with ASTM A1008: 2013 and is available in the grades shown below.
ASTM A1008: 2013 |
---|
Grade |
CS TYPE A |
CS TYPE B |
DS TYPE A |
DS TYPE B |
DDS |
EDDS |
For products produced in the Netherlands click here.
EN_US-Product-Cold-rolled-All Grades Surface aspects TSUK
Surface aspects
Surface quality according to ASTM A1008: 2013 and ASTM A568: 2011.
Surface quality class 1 (exposed):
The better side must be free of defects that can spoil the uniform appearance of a high-quality paint or of an electrolytic coating. The other side must at least conform to surface quality unexposed.
Surface quality class 2 (unexposed):
Defects that do not influence the formability or the application of surface coatings are permitted. These are defects such as pores, minor scratches, slight indentations, small grooves or slight discolouration.
Inspected side
As a rule, the upper side of the strip is inspected; on request, the strip can be wound so that the inspected side is the underside.
Surface texture/roughness
Cold-rolled annealed and skin passed steel is available with ‘Regular matte’ surface texture.
Description | Roughness µinch CLA |
---|---|
Regular matte | 24 - 76 |
Preservative oil
The standard oil applied by Tata Steel acts as a protective coating. Other types of oil may be available to meet your requirement.
Tata Steel offers a range of oiling levels, 37-241 mg/ft2 per side. Please specify your exact requirements in the enquiry.
Other oiling levels are available on request. Tata Steel is not responsible for the risk of corrosion during storage or shipment if material is ordered in the unoiled condition.
Surface cleanliness
Tata Steel can guarantee improved surface cleanliness on request for batch annealed products. The cleanliness is tested with a tape test, in which the loss of reflection is measured.
The reflection gives an indication of the oil residue on the annealed product.
Continuously annealed products typically exhibit a loss of reflection up to around 10%.
EN_US-Product-Cold-Rolled-Forming-DDS-Dimensions TSUK
Dimensions
For batch annealed (BA) products.
Dimensions in inches.
Thickness | Max. width |
---|---|
From - up to | DDS |
0.014 - 0.020 | 51 |
0.020 - 0.024 | 57 |
0.024 - 0.026 | 63 |
0.026 - 0.028 | 65 |
0.028 - 0.031 | 67 |
0.031 - 0.063 | 70 |
0.063 - 0.067 | 69 |
0.067 - 0.071 | 65 |
0.071 - 0.118 | 59 |
Minimum width is 28 inch.
For products produced in the Netherlands click here.
EN_US-Product-Cold-rolled-All grades Shape and dimensional tolerances TSUK
Shape and dimensional tolerances
Tolerances on thickness
Tata Steel can supply to full thickness tolerance specified in ASTM A568: 2015.
Thickness tolerances over, no tolerance under. Tighter tolerances are available as shown below:
Specified Width, in. | Thickness tolerances available | ||
---|---|---|---|
ASTM A 568 (2019) | |||
From - up to | To 15, incl | Over 15 to 72, incl | Over 72 |
To 0.014, excl | 0.001 | 0.001 | ... |
0.014 to 0.019, incl | 0.002 | 0.002 | ... |
Over 0.019A to 0.039, incl | 0.003 | 0.003 | 0.003 |
Over 0.039 to 0.057,incl | 0.004 | 0.004 | 0.004 |
Over 0.057 to 0.071,incl | 0.005 | 0.005 | 0.005 |
Over 0.071 to 0.098, incl | 0.005 | 0.005 | 0.006 |
Over 0.098 to 0.142, incl | 0.005 | 0.006 | 0.007 |
Minimum thickness, 0.021 in. for high-strength, low-alloy.
The specified thickness range captions apply independent of whether the ordered thickness is stated as a nominal or minimum.
The tolerances provided in the table are based on minimum thickness (tolerance over, no tolerance under).
For nominal thickness, the tolerance is divided equally over and under.
Tolerances on width, edge camber and flatness
Material will be supplied conforming to the tolerances specified in ASTM A568 (2007) / A635 (2007).
Width tolerances are over, no tolerance under.
Width tolerances available | ||
---|---|---|
Specified Width, in. | ASTM A568: 2019 | |
To 6, incl | Over 6 to 9, inc | Over 9 to 12, inc |
0.012 | 0.016 | 0.032 |
0.020 in. minimum thickness for high-strength low-alloy.
Camber Tolerances available ASTM A568: 2019 |
---|
Specified Width, in. |
To 12, incl |
1⁄4 in. in any 8 ft |
0.020 in. minimum thickness for high-strength low-alloy.
Flatness tolerances Under Specified Yield Point, min, 45ksi ASTM A568: 2019 | ||
---|---|---|
Specified Width, in. | Specified Thickness, in. | |
To 0.044, incl | Over 0.044 | |
to 36 incl | 3⁄8 | - |
over 36 to 60 incl | 5⁄8 | - |
over 60 | 7⁄8 | - |
to 36 incl | - | 1⁄4 |
over 36 to 60 incl | - | 3⁄8 |
over 60 to 72 incl | - | 5⁄8 |
over 72 | - | 7⁄8 |
Flatness tolerances Under Specified Yield Point, min, 45 to 50 incl. ASTM A568: 2019 | ||
---|---|---|
Specified Width, in. | Specified Thickness, in. | |
To 0.044, incl | Over 0.044 | |
to 36 incl | 3⁄4 | - |
over 36 to 60 incl | 1 1⁄8 | - |
over 60 | 1 1⁄2 | - |
to 36 incl | - | 3⁄4 |
over 36 to 60 incl | - | 3⁄4 |
over 60 to 72 incl | - | 1 1⁄8 |
over 72 | - | 1 1⁄2 |
Maximum deviation from a horizontal flat surface
Tolerances for high-strength, low-alloy steel with specified minimum yield point in excess of 50 ksi are subject to negotiation.
Dimensions and coil weights
Tata Steel can supply hot-rolled steels with the following minimum and maximum dimensions and weights.
Description | Availability |
---|---|
Coil diameter inner | 24 inch |
Coil diameter outer | 83 inch max. |
Coil weight | 66,000 Ibs max. |
Coil weight limited by maximum outer diameter | |
Maximum weight allowed by road/rail transport | |
Some products may have different coil weight ranges available | |
Minimum tonnage per order | Refer to price list for order quantity details |
Minimum order quantities may apply |
EN_US-Product-Cold-Rolled-Forming-EDDS TSUK
EN_US-Product-Cold-rolled-Forming-All Grades Overview TSUK
Our forming steel is available in a choice of widths up to 72 inch and thicknesses up to 0.12 inch. This provides opportunities for cutting waste and maximising yield.These products are made using one of two process routes:
- continuous annealing (CA) up to 0.06 inch
- batch annealing (BA) up to 0.12 inch
Applications
- Automotive components and body panels
- Building components
- Domestic appliances
- Electrical goods
- Furniture
- Radiators
- Tubes
- Drums
- Coins
Relationship with standards
Cold-rolled steel for forming complies with ASTM A1008: 2013 and is available in the grades shown below.
ASTM A1008: 2013 |
---|
Grade |
CS TYPE A |
CS TYPE B |
DS TYPE A |
DS TYPE B |
DDS |
EDDS |
For products produced in the Netherlands click here.
EN_US-Product-Cold-rolled-All Grades Surface aspects TSUK
Surface aspects
Surface quality according to ASTM A1008: 2013 and ASTM A568: 2011.
Surface quality class 1 (exposed):
The better side must be free of defects that can spoil the uniform appearance of a high-quality paint or of an electrolytic coating. The other side must at least conform to surface quality unexposed.
Surface quality class 2 (unexposed):
Defects that do not influence the formability or the application of surface coatings are permitted. These are defects such as pores, minor scratches, slight indentations, small grooves or slight discolouration.
Inspected side
As a rule, the upper side of the strip is inspected; on request, the strip can be wound so that the inspected side is the underside.
Surface texture/roughness
Cold-rolled annealed and skin passed steel is available with ‘Regular matte’ surface texture.
Description | Roughness µinch CLA |
---|---|
Regular matte | 24 - 76 |
Preservative oil
The standard oil applied by Tata Steel acts as a protective coating. Other types of oil may be available to meet your requirement.
Tata Steel offers a range of oiling levels, 37-241 mg/ft2 per side. Please specify your exact requirements in the enquiry.
Other oiling levels are available on request. Tata Steel is not responsible for the risk of corrosion during storage or shipment if material is ordered in the unoiled condition.
Surface cleanliness
Tata Steel can guarantee improved surface cleanliness on request for batch annealed products. The cleanliness is tested with a tape test, in which the loss of reflection is measured.
The reflection gives an indication of the oil residue on the annealed product.
Continuously annealed products typically exhibit a loss of reflection up to around 10%.
EN_US-Product-Cold-Rolled-Forming-EDDS-Dimensions TSUK
Dimensions
For continuously annealed (CA) products.
Dimensions in inches.
Thickness | Max. width |
---|---|
From - up to | EDDS |
0.020 - 0.024 | 50 |
0.024 - 0.026 | 63 |
0.026 - 0.028 | 65 |
0.028 - 0.031 | 67 |
0.031 - 0.047 | 70 |
Minimum width is 32 inch.
For batch annealed (BA) products.
Dimensions in inches.
Thickness | Max. width |
---|---|
From - up to | EDDS |
0.020 - 0.024 | 57 |
0.024 - 0.026 | 63 |
0.026 - 0.028 | 65 |
0.028 - 0.031 | 67 |
0.031 - 0.047 | 70 |
0.047 - 0.063 | 53 |
Minimum width is 28 inch.
For products produced in the Netherlands click here.
EN_US-Product-Cold-rolled-All grades Shape and dimensional tolerances TSUK
Shape and dimensional tolerances
Tolerances on thickness
Tata Steel can supply to full thickness tolerance specified in ASTM A568: 2015.
Thickness tolerances over, no tolerance under. Tighter tolerances are available as shown below:
Specified Width, in. | Thickness tolerances available | ||
---|---|---|---|
ASTM A 568 (2019) | |||
From - up to | To 15, incl | Over 15 to 72, incl | Over 72 |
To 0.014, excl | 0.001 | 0.001 | ... |
0.014 to 0.019, incl | 0.002 | 0.002 | ... |
Over 0.019A to 0.039, incl | 0.003 | 0.003 | 0.003 |
Over 0.039 to 0.057,incl | 0.004 | 0.004 | 0.004 |
Over 0.057 to 0.071,incl | 0.005 | 0.005 | 0.005 |
Over 0.071 to 0.098, incl | 0.005 | 0.005 | 0.006 |
Over 0.098 to 0.142, incl | 0.005 | 0.006 | 0.007 |
Minimum thickness, 0.021 in. for high-strength, low-alloy.
The specified thickness range captions apply independent of whether the ordered thickness is stated as a nominal or minimum.
The tolerances provided in the table are based on minimum thickness (tolerance over, no tolerance under).
For nominal thickness, the tolerance is divided equally over and under.
Tolerances on width, edge camber and flatness
Material will be supplied conforming to the tolerances specified in ASTM A568 (2007) / A635 (2007).
Width tolerances are over, no tolerance under.
Width tolerances available | ||
---|---|---|
Specified Width, in. | ASTM A568: 2019 | |
To 6, incl | Over 6 to 9, inc | Over 9 to 12, inc |
0.012 | 0.016 | 0.032 |
0.020 in. minimum thickness for high-strength low-alloy.
Camber Tolerances available ASTM A568: 2019 |
---|
Specified Width, in. |
To 12, incl |
1⁄4 in. in any 8 ft |
0.020 in. minimum thickness for high-strength low-alloy.
Flatness tolerances Under Specified Yield Point, min, 45ksi ASTM A568: 2019 | ||
---|---|---|
Specified Width, in. | Specified Thickness, in. | |
To 0.044, incl | Over 0.044 | |
to 36 incl | 3⁄8 | - |
over 36 to 60 incl | 5⁄8 | - |
over 60 | 7⁄8 | - |
to 36 incl | - | 1⁄4 |
over 36 to 60 incl | - | 3⁄8 |
over 60 to 72 incl | - | 5⁄8 |
over 72 | - | 7⁄8 |
Flatness tolerances Under Specified Yield Point, min, 45 to 50 incl. ASTM A568: 2019 | ||
---|---|---|
Specified Width, in. | Specified Thickness, in. | |
To 0.044, incl | Over 0.044 | |
to 36 incl | 3⁄4 | - |
over 36 to 60 incl | 1 1⁄8 | - |
over 60 | 1 1⁄2 | - |
to 36 incl | - | 3⁄4 |
over 36 to 60 incl | - | 3⁄4 |
over 60 to 72 incl | - | 1 1⁄8 |
over 72 | - | 1 1⁄2 |
Maximum deviation from a horizontal flat surface
Tolerances for high-strength, low-alloy steel with specified minimum yield point in excess of 50 ksi are subject to negotiation.
Dimensions and coil weights
Tata Steel can supply hot-rolled steels with the following minimum and maximum dimensions and weights.
Description | Availability |
---|---|
Coil diameter inner | 24 inch |
Coil diameter outer | 83 inch max. |
Coil weight | 66,000 Ibs max. |
Coil weight limited by maximum outer diameter | |
Maximum weight allowed by road/rail transport | |
Some products may have different coil weight ranges available | |
Minimum tonnage per order | Refer to price list for order quantity details |
Minimum order quantities may apply |
EN_US-Tata Steel in the USA and Canada
Tata Steel in the USA and Canada
Chicago office
475 N. Martingale Road, Suite 330
Schaumburg, IL 60173
United States